What Is the Best Bread Making Kit for Beginners Today?
21 Views
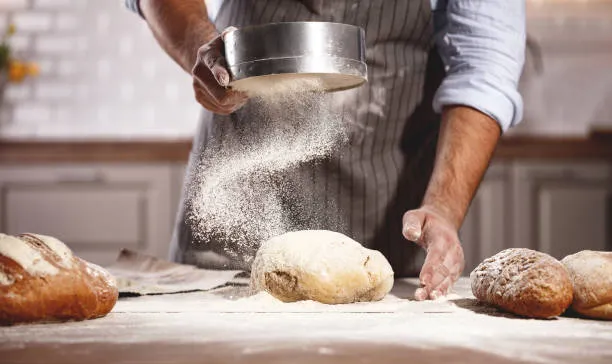

I remember my first loaf. It was a brick. A sad, pale, dense brick that I still tried to butter and eat out of pure stubbornness. If you're standing where I stood, scrolling around and wondering what the best bread making kit actually is, you're not alone. Loads of people got into baking over the last few years and plenty of them stuck with it. Bread is cheap, it smells great, and there's something satisfying about pulling a loaf out of your own oven. But the gear matters more than people admit. Get the wrong stuff and you'll quit by week three.
What Actually Comes in a Bread Kit
Most kits bundle the basics so you don't have to hunt around. You'll usually find a banneton or proofing basket, a dough scraper, a lame for scoring, maybe a cloth liner, and sometimes a whisk or a thermometer. Some throw in a recipe booklet too. Cheaper ones skip half of that and call it a day. The point of a kit is simple, you open one box and have what you need on day one. Honestly that's the appeal. Nobody wants to order eight separate things from eight separate shops and wait on all of them to arrive.
The Tools You'll Use Every Single Time
Let's be blunt about this. Some tools get used weekly and others collect dust. The dough scraper is the one I grab constantly, for cutting, folding, cleaning the counter, everything. A decent lame matters too, because a dull razor drags through dough and wrecks your score. A bench knife is fine if you don't have a scraper. The whisk, the fancy danish dough thing with the wooden handle? Eh. Nice to look at. I'd say focus on the scraper, the lame, and a good proofing setup first, then add the extras once you know what kind of baker you're turning into.
Why Your Dough Needs a Proper Basket for Bread Rising
Here's something that took me too long to figure out. Dough is sticky, it's soft, and it wants to spread out like a puddle. A good basket for bread rising holds it upright while it ferments, so you get a tall loaf instead of a flat one. The coiled cane wicks a bit of moisture off the surface too, which helps with that crisp crust and those pretty flour rings on the outside. You can use a bowl and a towel if you're desperate. I did, for months. But once I switched, my loaves improved overnight, no joke.

Round Versus Oval, Which Shape Should You Pick
This one trips people up. Round baskets suit boules and fit nicely in most dutch ovens, so they're the safe pick if you're just starting. Ovals, or battards as bakers call them, give you that longer sandwich-friendly loaf and look gorgeous scored. The catch is your baking vessel. If your pot is round, an oval loaf will hang over the edges and you'll be swearing at it. Check your cookware before buying anything. Size matters as well, most beginner recipes use around nine inches, and a basket that's too big lets the dough sprawl.
Material, Liners, and the Stuff Nobody Mentions
Cane, or rattan, is the classic. Wood pulp baskets exist too and some people love them, though I find cane more forgiving. Pay attention to how the thing is finished. Rough edges or loose fibers will snag the dough and you'll be peeling it off in chunks, which is a bad morning. Liners help with wetter doughs, but a heavy dusting of rice flour works just as well and honestly gives a nicer pattern. Don't wash cane with soap. Just tap it out, brush it, and let it dry fully. Mold is real, and it will ruin your week.
Do You Need a Dutch Oven With It
Short answer, kind of. A dutch oven traps steam, and steam is what gives you big oven spring and a shiny crackly crust. Home ovens just don't hold steam well on their own. Some kits include a baking pot or a cloche, but plenty don't, and that's fine if you already own a cast iron pot. If you don't, you can fake it with a baking stone and a pan of boiling water on the lower rack. It works, mostly. It's messier and a bit riskier though, so be careful with the hot water.
Sourdough or Yeast, Pick Your Poison
I'd steer total beginners toward yeasted dough first. It's quicker, more predictable, and you get a win fast, which keeps you motivated. Sourdough is brilliant but it's needy. You've got a starter to feed, timing to figure out, and a fair amount of failure ahead. Most kits will work with either, so that's not a deal breaker. Just read the product description so you know what the included recipe expects. If you're keen on sourdough eventually, look for something that mentions a starter jar, because those little extras save a lot of faffing later on.
What Beginners Get Wrong, Over and Over
Rushing the proof is number one. People watch the clock instead of the dough, and a cold kitchen will slow everything down. Number two is too much flour on the counter, which dries the dough out. Number three is skipping the scoring, then wondering why the loaf split open on the side like a bad zipper. And four, honestly, is expecting perfection early. Your first ten loaves will be weird. Some will be ugly. They'll still taste good, mostly, and each one teaches you something the videos can't, like how dough should feel under your fingers.
How to Spot a Kit Worth Your Money
Price isn't everything but it tells you something. Very cheap sets tend to have flimsy lames, thin cane, and baskets that smell funny out of the box. Pricey doesn't always mean better either. Look at reviews that mention actual baking, not just unboxing photos. Check what's included versus what you'd need to buy separately, because a kit that skips the scraper isn't saving you anything. Some small brands, Abioto Baking being one I've seen, focus on sturdy, no-nonsense sets rather than flashy packaging, and that's usually the better sign than a pretty box.

Caring For Your Gear So It Lasts
Your tools will outlive a lot of kitchen gadgets if you treat them right. Brush out the flour after every bake, let the proofing basket air dry somewhere with airflow, and keep it away from damp cupboards. Wipe the scraper, replace the lame blade when it gets dull, and don't stick wood or cane in the dishwasher, ever. A little dusty flour in the grooves is normal, even helpful. Think of it like a seasoned pan. Over time it builds up a bit of character, and your loaves release more easily because of it.
Final Thoughts: Start Simple, Then Get Fussy
So, what should you actually buy? Something simple, solid, and complete enough that you can bake this weekend. You don't need forty gadgets. You need a decent proofing basket, a scraper, a lame, and the patience to let dough do its thing. Pick a kit that matches your oven and your goals, then bake a lot. Ugly loaves included. The skill comes from repetition, not equipment, though the right gear makes the whole thing less frustrating. Start there, stay curious, and in a month or two you'll be giving bread away to neighbors, I promise.
Related Reading
Top 10 Hidden Secrets About Business & Finance You Need to Know
Welcome to our in-depth exploration of Business & Finance. In an era defined...
Why Business & Finance is Transforming the Global Industry Landscape
Welcome to our in-depth exploration of Business & Finance. In an era defined...