What Is Included in Drywall Installation
5 Views
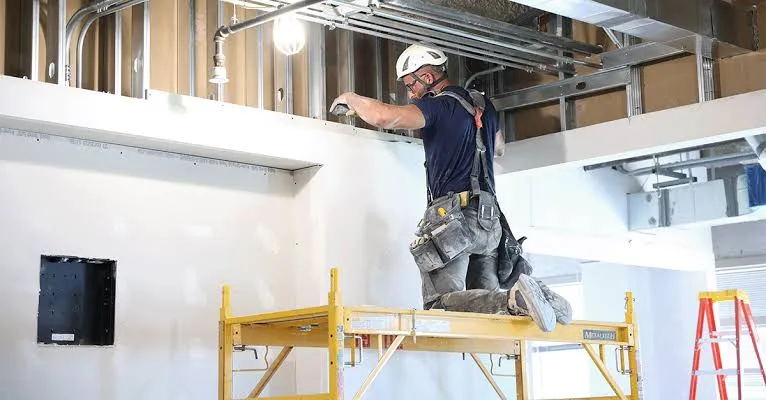
Drywall installation involves several steps that help create smooth, durable interior walls and ceilings. For homeowners and property managers in McKinney, TX, professional drywall installation can provide a clean surface that is ready for painting, wallpaper, or other finishing work. The process includes more than attaching drywall panels to wall framing. A proper installation considers panel selection, accurate measurements, cutting, fastening, joint treatment, sanding, and surface preparation. The installer also needs to work around electrical outlets, doors, windows, plumbing, and other features within the wall. Careful workmanship at each stage can reduce visible seams, uneven surfaces, and unnecessary repairs. Understanding what is included in drywall installation can make it easier to plan a remodeling project, new construction, room addition, or interior repair and know what to expect before the work begins.
Preparing The Walls For Drywall Installation
Proper preparation gives drywall a stable foundation and helps the finished surface look consistent. Before panels are installed, the framing should be inspected to make sure studs and ceiling supports are properly positioned and reasonably level. The installer also checks the wall cavity for electrical wiring, plumbing, insulation, and other components that may affect panel placement. Measurements are then taken so drywall sheets can be planned around doors, windows, outlets, switches, and corners. This planning helps reduce unnecessary seams and material waste. Moisture resistant drywall or other specialized panels may be selected when the room requires particular performance characteristics. The goal is to create a practical installation plan before fastening the first panel. Good preparation can also make later finishing work easier and reduce the chance of problems appearing after the drywall has been completed.
Measuring And Cutting Drywall Panels
Drywall sheets need accurate measurements before cutting. Installers typically mark each panel according to the dimensions of the wall or ceiling and make openings for fixtures and other features. Clean cuts help panels fit together properly and can make joint finishing more manageable. The installer also considers panel orientation and seam placement during this stage.
Tip, Check the wall framing and measurements carefully before installation begins, especially around corners, openings, and electrical fixtures.
Installing And Securing Drywall Panels
Once preparation is complete, drywall panels are positioned against the framing and secured with appropriate fasteners. The installer needs to maintain proper spacing and alignment while making sure the panels sit firmly against the framing members. Ceiling drywall may require additional attention because panel weight and positioning can make installation more demanding. Wall panels are generally installed in a planned sequence to create stable surfaces and manageable joints. Around windows, doors, corners, outlets, and switches, careful cutting is necessary to maintain clean edges. The installer also considers how seams will be distributed across the surface because excessive alignment of joints can make finishing more noticeable. Professional drywall installation focuses on creating a solid base for the finishing stages. Accurate fastening and panel placement can help minimize movement, uneven joints, and surface imperfections after the wall is completed.
Fastening Panels Correctly
Drywall fasteners need to be placed correctly so the panels remain secure without damaging the paper surface. Screws or other approved fasteners should reach the framing securely and sit properly within the panel. Excessive fastening pressure can damage the drywall and create additional finishing work.
Finishing Drywall Joints And Seams
After the panels are secured, the seams between sheets need to be finished. Joint compound and drywall tape are commonly used to create a continuous surface across panel joints. The compound is applied in controlled layers, allowing each stage to dry before additional material is added. Corners and fastener locations also require attention because these areas can become noticeable if they are not finished properly. The installer gradually builds and smooths the compound so the transition between panels becomes less visible. Sanding is then used to refine the surface and remove ridges or uneven spots. Good drywall finishing takes patience because applying too much compound or sanding too aggressively can create new imperfections. The final goal is a smooth wall or ceiling that looks consistent under normal lighting and provides a suitable base for paint or another decorative finish.
Taping And Applying Joint Compound
Drywall tape helps reinforce panel joints while joint compound creates a smooth transition across the seam. Several thin applications can produce a cleaner result than one heavy application. Each layer should be allowed to dry properly before the next stage begins.
Sanding And Surface Preparation
Once the joint compound has dried, the surface is sanded and inspected for remaining imperfections. Installers may apply additional compound when necessary and repeat the sanding process until the surface is sufficiently smooth. Proper preparation at this stage helps paint and other finishes appear more even.
Tip, Inspect drywall under normal room lighting before painting because small ridges, dents, or uneven seams can become easier to notice once the surface is finished.
What Happens After Drywall Installation
Drywall installation is usually followed by a final inspection and surface preparation before decorative finishing begins. The installer checks seams, corners, fastener locations, and transitions around doors and windows. Any remaining imperfections can be corrected before primer or paint is applied. This final review is useful because small surface issues are easier to address before the wall receives its finished coating. Depending on the project, the drywall may be prepared for interior painting, wallpaper, texture, or another wall treatment. Some projects may also require additional work around trim, electrical fixtures, or built in features. Good coordination between drywall installation and the next construction stage helps maintain a clean workflow. The finished drywall should provide a stable, smooth surface that fits naturally with the surrounding interior. Proper installation and finishing can also make future maintenance and repainting easier.
Final Inspection Before Painting
A final inspection gives the installer an opportunity to identify visible imperfections before another trade begins work. The surface should be checked for uneven joints, exposed fasteners, damaged edges, and inconsistent finishing. Correcting these details at this stage can improve the overall appearance of the finished room.
Drywall Installation For Different Projects
Drywall installation can be part of new construction, home remodeling, room additions, basement finishing, office improvements, and drywall repair. Each project can have different requirements depending on the room, framing, panel type, and desired finish. Understanding the complete process helps property owners plan the work more effectively.
Frequently Asked Questions
What Is Included In Drywall Installation
Drywall installation commonly includes measuring, cutting, panel placement, fastening, taping, joint compound application, sanding, and surface preparation.
How Long Does Drywall Installation Take
The timeline depends on the size of the project, number of rooms, ceiling work, panel type, and finishing requirements.
Is Drywall Used For Ceilings
Yes, drywall is commonly installed on interior ceilings as well as walls. Ceiling installation requires appropriate framing support and careful fastening.
Does Drywall Installation Include Painting
Painting is often a separate service unless it is specifically included in the project scope. Drywall is normally finished and prepared before primer or paint is applied.
Can Damaged Drywall Be Repaired
Yes, many types of drywall damage can be repaired. The appropriate method depends on the size and location of the damage.
Why Is Professional Drywall Finishing Important
Professional finishing can help create smoother seams, cleaner corners, and a more consistent surface before painting or applying another wall treatment.
Related Reading
Expert Insights: Navigating the Complex World of Home Improvement
Welcome to our in-depth exploration of Home Improvement. In an era defined by ra...
Why Home Improvement is Transforming the Global Industry Landscape
Welcome to our in-depth exploration of Home Improvement. In an era defined by ra...