Counter Display Boxes That Turn Checkout Space Into Sales
18 Views
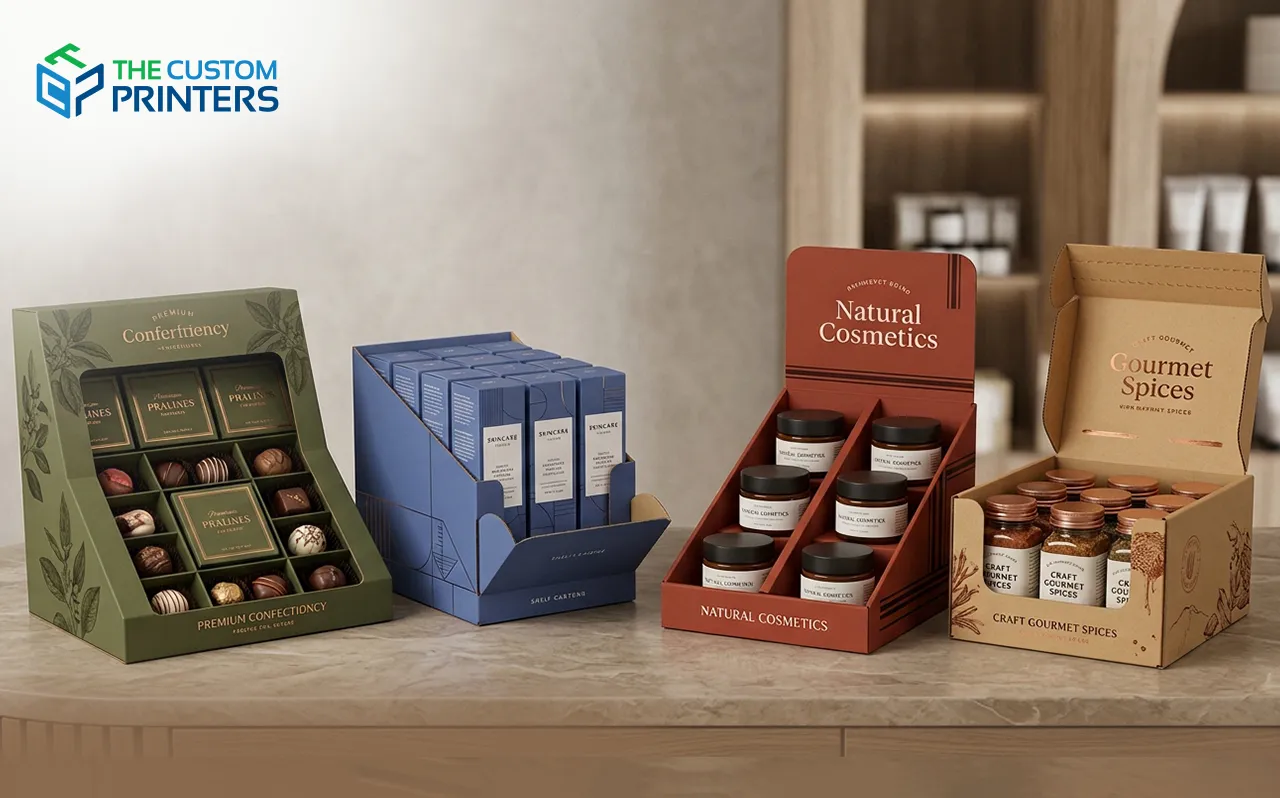
Most shoppers arrive at the till with a plan, yet a surprising share of them leave with something they had not planned to buy. That gap is where small, well-placed products earn their keep. Choosing counter display boxes for the right kind of product, at the right price, and with the right message gives an item a real chance at that last-minute decision. This guide looks at what belongs at the checkout and how to present it.
What Sells at the Till
Impulse buyers want something small, familiar, and easy to justify. Lip balms, candy, phone accessories, soap bars, snacks, and small gifts all fit the pattern. The best items need no explanation, cost little compared with the main purchase, and can be picked up with one hand. If a shopper has to read a paragraph to understand the product, it probably belongs on a regular shelf instead.
Price Points That Encourage a Quick Yes
Checkout products usually sell best when the price feels trivial. Many retailers see strong results below the cost of a coffee or a small lunch. Bundles, such as three items for a set price, can lift the basket value without raising the sticker price on any single product. Make the price visible on the header or shelf edge, since hidden pricing slows the decision.
Four Questions to Ask Before You Design the Unit
Answer these first, and your display will suit its job far better.
- Is the product small enough to pick up and carry with one hand?
- Does it make sense without a long explanation or demonstration?
- Is the price low enough to feel like an easy add-on at the till?
- Can several flavors, scents, or shades share one unit without confusion?
Header Cards That Do the Talking
The header panel is the only part of a counter unit that faces the shopper from a distance. Put the brand and one short claim there, in large type with strong contrast. A simple promise, such as "handmade," "new," or "three for a set price," works better than a long slogan. Keep logos away from fold lines and edges, where print can crack when the display is assembled.
Layouts That Show Variety Without Clutter
Rows of identical items look tidy but dull, while a mixed layout hints at choice. Tiered shelves let every row stay visible, and angled trays tilt products towards the customer's hand. Group flavors or shades by color so the arrangement looks deliberate. Leave a little breathing room, since a crammed display looks messy and makes picking one item harder.
Size and Height for Busy Counters
Space near the till is tight, and staff dislike anything that blocks the card reader or their view of the queue. Check typical counter dimensions in your target stores and keep the footprint compact. A slightly shorter unit that stays in place beats a tall one that gets moved to a corner. If your product sells in several store types, a second size can keep you on more counters.
Think About Refill and Replacement
A half-empty display sells less than a full one, so refilling should take seconds. Design the unit to hold exactly one case of stock, and make loading possible from the front or top. Keep spare headers ready for seasonal changes, so one base can serve several promotions. Ask store staff for feedback after the first few weeks and adjust accordingly.
Working With a Printer That Builds for the Till
The Custom Printers builds each sample around the product and the counter it will sit on. You can share your item, request a prototype with the header and layout you are considering, and test it in a store before production begins. That process gives you clear evidence of how your counter display boxes will perform at the checkout.
The checkout rewards simple products, clear prices, and tidy displays. Choose items that sell themselves, design a bold header, keep the footprint compact, and test a prototype in a real shop. If you want help bringing those ideas together, The Custom Printers is ready to assist.
Cardboard Packaging That Protects Products and Cuts Waste
A carton that is too big does three kinds of damage at once. It costs more to ship, it needs more filler to stop the product rattling, and it sends the customer a pile of empty space along with their order. Right-sizing is the simplest improvement a seller can make, and it starts with measuring honestly. Choosing cardboard packaging that fits the product closely protects the contents, trims freight bills and reduces what ends up in the recycling bin. This guide shows how to get there.
Why Oversized Boxes Cost More Than You Think
Couriers charge by weight and by the space a parcel occupies, so a box with extra air can move into a pricier band. Void space also lets items slide and collide, which raises the damage rate and the cost of replacements. Filler paper, bubble wrap and air pillows add material and labor on top. A tighter fit often pays for itself within a few hundred orders.
Measure the Product the Right Way
Record length, width and height at the widest points, including any cap, handle or protective wrap. Measure the packed item, not the bare one, since a sleeve or a pouch adds thickness. Allow a small margin, usually a few millimeters on each side, so the product slides in without forcing. A folded paper mock-up shows problems before any board is cut.
Four Steps to Right-Size Your Cartons
Work through these in order, and keep your results in one shared sheet.
- Measure every product in its final retail wrap, and record the three dimensions.
- Group items whose sizes fall within a few millimeters, and choose a shared carton for each group.
- Test each group with real products, shaking and dropping a packed sample from waist height.
- Compare the shipped weight and size against your courier's price bands, and adjust if a band is missed by a small margin.
Pick the Lightest Board That Still Passes
Heavier board costs more to buy and more to ship, so choose the lightest grade that survives a realistic test. Single wall suits many light and medium items, while double wall is saved for heavy or fragile goods. A good insert often lets you use a thinner outer carton, since the insert does part of the protecting. Test with your actual product, since a label on a data sheet cannot predict how your item behaves.
Fill the Gaps With Less Material
Where a small gap remains, use fillers that match the job. Folded kraft paper is cheap and recyclable, while molded pulp trays hold awkward shapes firmly. Corrugated inserts cut from the same board keep the material stream simple for recycling. Avoid mixing plastic and paper layers that customers cannot separate easily.
Print Less, Say More
A simple one-color print costs less than full coverage and works well on natural board. Keep the design bold and the message short, such as the brand name and a recycling reminder. Water-based inks keep the carton easy to recycle. Plain stock with a stamp or a label can look just as polished as a fully printed box.
Tell Customers How to Recycle It
A short instruction on the inside flap or base helps buyers dispose of the carton correctly. Keep the wording factual, for example flatten and recycle with paper, and avoid vague green claims. If a coating limits recycling in some regions, say so. Honest, modest statements build more trust than sweeping ones.
Working With a Printer That Right-Sizes Your Orders
The Custom Printers reviews your product dimensions and shipping method before quoting, and suggests sizes and board grades that fit snugly without wasting material. You can send your items, request packed samples and compare the weight and price bands before production begins. That process gives you clear evidence of how your cardboard packaging will perform and cost.
Smaller, lighter cartons lower costs and waste at the same time. Measure the packed product, group sizes sensibly, choose the lightest board that passes and test before ordering in volume. If you want a partner that helps with those checks, The Custom Printers is ready to assist.
Related Reading
Top 10 Hidden Secrets About Business & Finance You Need to Know
Welcome to our in-depth exploration of Business & Finance. In an era defined...
Why Business & Finance is Transforming the Global Industry Landscape
Welcome to our in-depth exploration of Business & Finance. In an era defined...